Last night, I was at a Chinese New Years party at West Van Baptist Church. During the party a few people asked me how hard it was to set up a blog and how long it would take. As luck with have it, I just happened to have my Macbook with me and decided to give a little demo on how to register a domain name, set up a new WordPress blog and have it all live on the Internet in 15 minutes.
Twelve year old Ifan Yang is the son of one of the church members. I decided to use him for the demo. The goal was to show everyone how easy it was to get a blog up and running. Here’s the step by step process.
Step 1 – Register The Domain Name
Deciding on a domain name can be the most time consuming of the entire blog creation process. Most people get stuck at this step and never move forward. Fortunately in this case, the domain name was Ifan’s name and it was available. The domain name was registered at GoDaddy .


If your domain name is available, then go ahead and register it. We just register the domain name. We didn’t use any other GoDaddy services. The main reason I like using GoDaddy is they have a really nice DNS manager that makes domain admin very easy. Total time to register the domain name was two minutes and cost $10.69.
Step 2 – Set Up The WordPress Blog
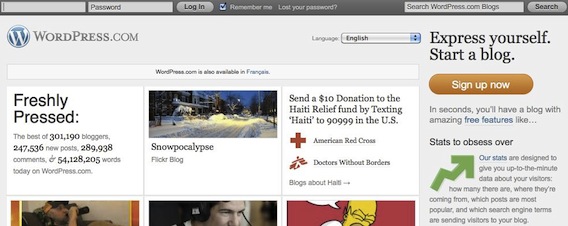
For this demo, I set the blog up at WordPress.com. This is WordPress’s free blog hosting service. I don’t recommend using this for a money making blog because WordPress.com does not allow you to place any type of advertisings on their service. However, if you’re looking to test the blogging waters, WordPress.com is a great service to get your feet wet in.
The main advantage of WordPress.com is it’s free and extremely easy to use. Registering an account and setting up the new blog took about ten minutes. The most time was spent deciding which theme to use.
Step 3 – Map The Domain Name
Blogs on WordPress.com use a sub domain structure. If you set up a blog on the service, the URL would generally be http://yourname.wordpress.com. This is fine for many bloggers but from a branding standpoint, it’s far less desirable. However WordPress.com offers a domain mapping service that will allow you to use your own domain name. Mapping a domain on WordPress.com cost $9.97.
WordPress does offer domain registration and mapping service for $14.97. However, I prefer to keep my domain provider and host provider separate. Should I wish to move any of my blogs to a new web host in the future, GoDaddy will allow me to do that easily. Trying to move a domain registered at WordPress.com would be a lot more difficult and may not even be possible.
To map a domain, log into your GoDaddy account and fire up the Domain Manager. Check the domain you want to admin and then choose Nameservers. This will pop up a box for you to enter the DNS information for WordPress.com
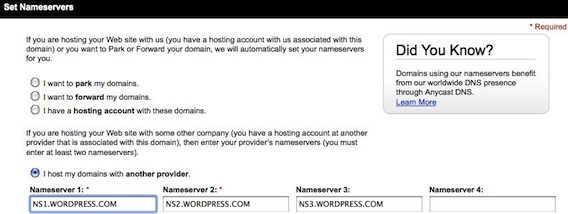
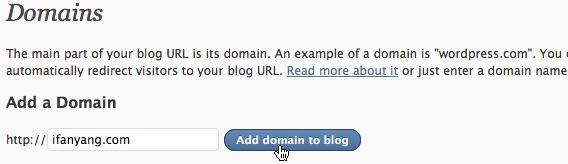
After entering the above DNS info, log back into your WordPress.com blog and go to Settings -> Domains in your blog’s dashboard, enter the domain into the form at the top of the page, and click the Add domain to blog button. If the name servers are verified, you will be prompted to purchase the required credits via PayPal and complete the mapping process.
After you have made your purchase, go back to the Settings -> Domains page, select the radio button next to the domain you just mapped to your blog and click the Update Primary Domain button.

As soon as I set the primary domain to use, I was able to view the blog on the Internet by typing IfanYang.com in a web browser. Total time to set up the domain map was three minutes. Here’s the finished blog.

Total cost of the demonstration was $20.66. I think I could have created the new blog in less than 15 minute but I was limited by the 3G speed of my iPhone connection. Now that the blog is up and running, the real work of keeping it updated begins. Good luck Ifan!