OK, so you took advantage of my free WordPress installation service and your new is blog up. Now what? Before you write your first blog post, there’s a few more things you need to do on your end. This post will go over them.
1 – Get a WordPress API Key
Part of my free WordPress installation included the Akismet spam filter and WordPress.com Stats. These are two fantastic WordPress plugins but they will not work until you enter an API key.
To get an API key for WordPress.com Stats, you need to sign up for a free WordPress.com account and WordPress will email you a key. To get an Akismet API key, go here.

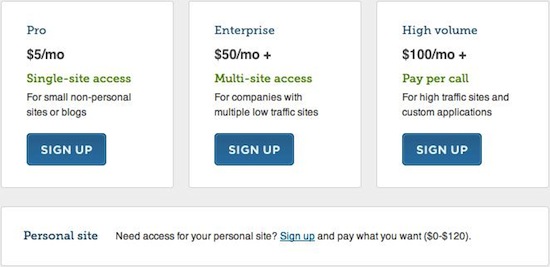
If you don’t want to pay the $5 a month for an Akismet key, click the sign up link for “Personal site” and slide the yearly contribution to $0 for the question, “WHAT IS AKISMET WORTH TO YOU?” The happy face will turn into a flown but you won’t have to pay.
Once you enter the key, your blog will be protected from spam by Akismet and you’ll be able to check your blog stats at WordPress.com.
2 – Sign Up for a Google Webmaster Account
Another plugin I installed is the Google XML sitemap. This plugin allows your site to be quickly indexed by Google. However, you still need to tell Google that you’re live on the Net and ask the Googlebot to visit. The fastest way to do that is with the Webmaster Tools found inside Google Webmaster Central.

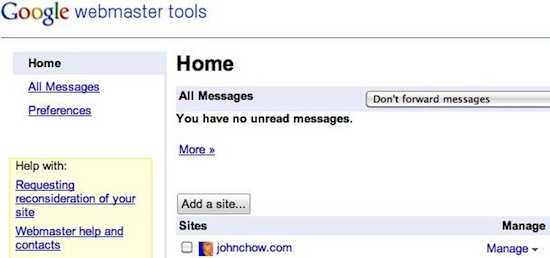
If you own a site on the Internet, you need a Google Webmaster account. It’s the fastest way to let Google know that your blog is alive. All that’s required to use Google Webmaster is a Gmail account. Once inside, click the “Add a site…” button and enter your blog’s URL.
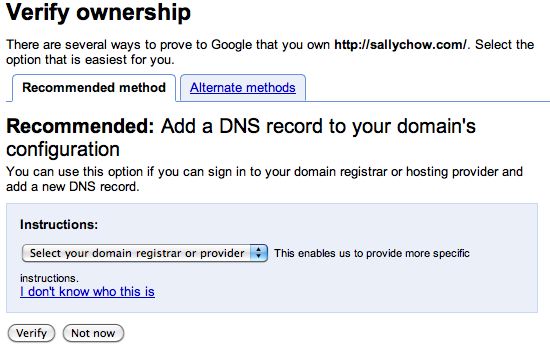
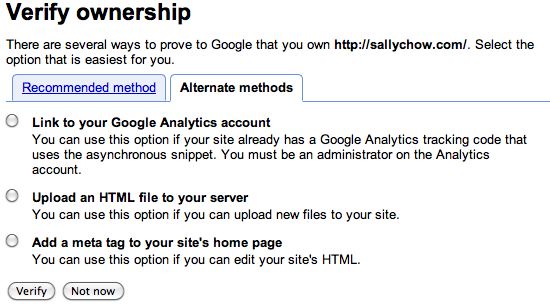
Google will need to verify the ownership of your blog before they allow you to do anything. The recommended method is to add a DNS record to your domain’s configuration. However, there are three alternate methods.


Personally, I prefer to upload an HTML file to my server but any method will work. Once you verified ownership, Google will send their bot to visit your blog.
The alternative to Webmaster Tools is to wait and hope Google eventually finds you. Unless you can get a bunch of other sites linking to you, the odds of Google finding you in the sea of blogs is pretty slim. You’ll be much better off by adding your blog with the Webmaster tools.
3 – Submit The Sitemap
The Google XML Sitemap plugin allows the Googlebot (and other crawlers) to see the complete structure of your blog and retrieve it more efficiently. It also notifies Google every time you create a new post and tell the bot to come on back and index the new content.
To complete the installation of the Google XML Sitemap, log into Google Webmaster Tools and enter the Sitemap’s URL.

Unless you messed around with the default settings, enter sitemap.xml into the field and then click “Submit Sitemap.” Google now knows where your blog’s sitemap is and will send the Googlebot to go index it. All of your blog’s pages should be in the Google index the next day, or sooner.
4 – Write Your First Blog Post
After installing the API key for Akismet and WordPress.com Stats, adding your blog to Google Webmaster Central and entering the sitemap URL, you are now ready to write your first blog post. Happy blogging!
Free WordPress Installation Service – Start Your Blog Today