Did you know that running a giveaway is a great way to grow your website? It’s true. Creating an online giveaway can increase your website traffic, boost brand awareness, grow your email list, build you a larger social media following, and more.
A successful giveaway can even help you generate more sales of your product or service. For instance, KnivesShipFree.com, an eCommerce store selling premium knives, boosted their revenue by $10,118.20 by running a giveaway.
But, how do you run a giveaway on WordPress?
Don’t worry, running a giveaway on WordPress isn’t difficult, especially if you use a WordPress giveaway plugin like RafflePress.

Here’s how to create a giveaway campaign in WordPress, step by step.
Step 1: Download RafflePress
The first step to creating a giveaway campaign in WordPress is to download RafflePress. RafflePress is the best WordPress giveaway plugin on the market.

Building a giveaway is super easy with RafflePress. They offer a drag and drop giveaway builder that allows even beginners to create a WordPress giveaway in an instant.
RafflePress offers features such as pre-built giveaway templates, social media integrations, viral sharing (refer-a-friend), 1-click entry and fraud protection, marketing and CRM integrations, and much more.
Plus, RafflePress offers verified bonus actions to help you reach your goals. These bonus actions reward users with extra contest entries when they complete the action, whether it’s joining your email list, following you on Twitter, visiting your YouTube page, and so on.
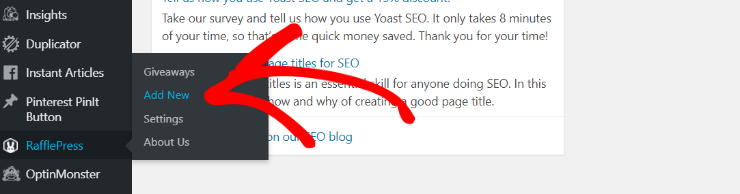
Step 2: Create a New Giveaway
After you’ve downloaded, installed, and activated RafflePress, it’s time to start creating your giveaway campaign.
To create a giveaway, hover over the RafflePress icon in your WordPress dashboard and click Add New.
Step 3: Name Your Giveaway and Pick a Template
Once you click on Add New, you’ll be taken to a new screen where you’ll name your giveaway and then choose a giveaway template.
RafflePress offers a number of pre-built giveaway templates that are designed to help you reach your specific giveaway goals such as Grow Your Email List, Grow Your Facebook Page, Refer-a-Friend Viral Giveaway, and more.
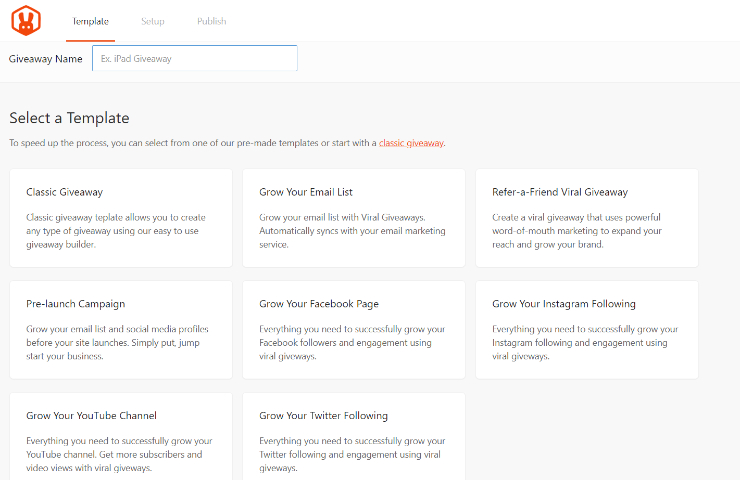
For this tutorial, choose the Classic Giveaway template. The Classic Giveaway template allows you to create any type of giveaway campaign.
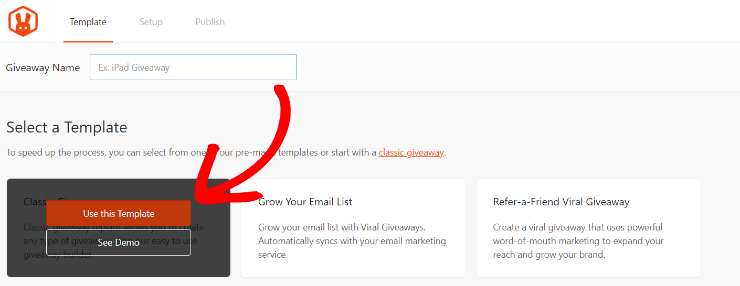
To choose the template, hover over it and click on Use this Template.
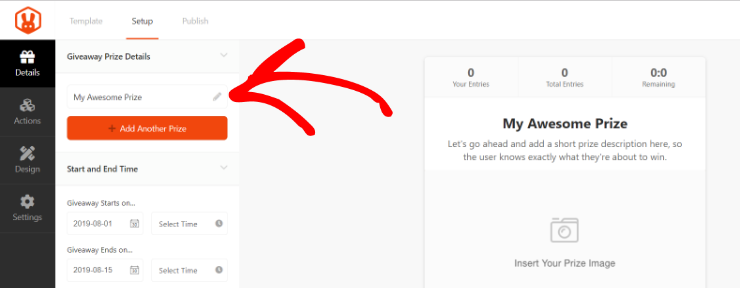
Step 4: Set the Giveaway Prize Details
Now you’ll be taken to the RafflePress giveaway builder. Here you can start to set the giveaway prize details.
A good contest prize is what will attract a ton of users to your giveaway. So, make sure you choose a prize that you know your audience will be interested in winning. Popular contest prizes include cash, gift certificates, and free products or services.
To add your giveaway prize details, click on the pencil icon in the Giveaway Prize Details section.
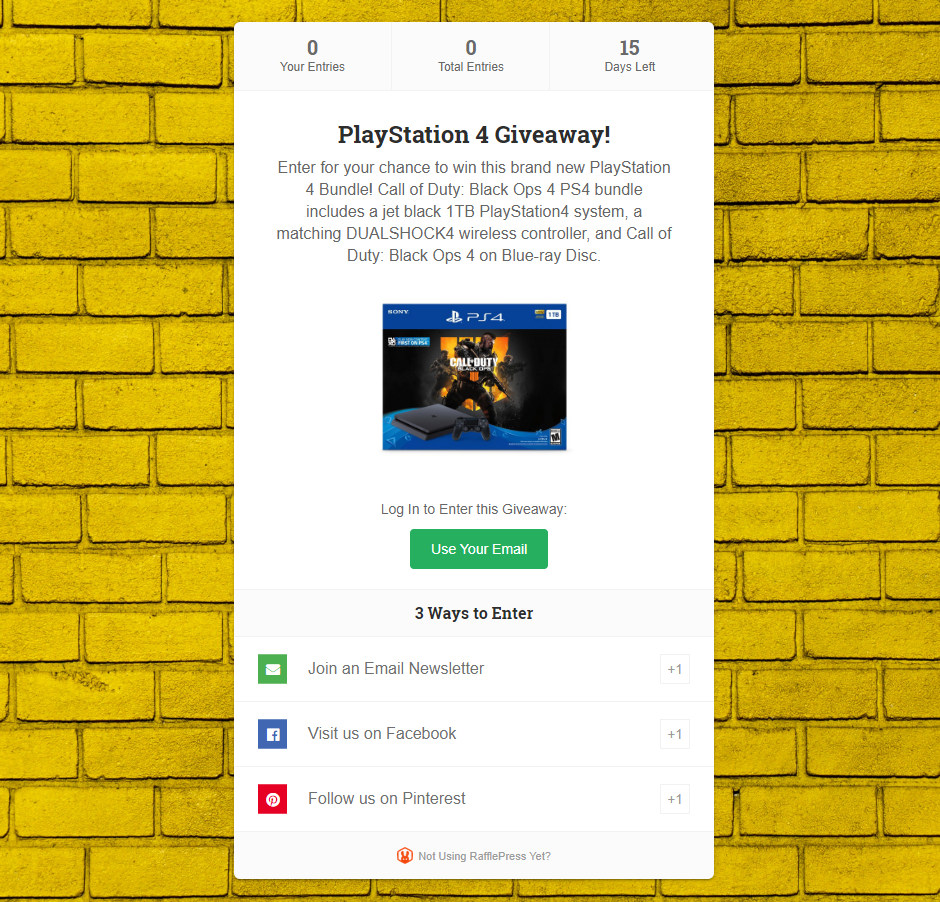
Here you can choose the name of your prize, for example “PlayStation 4 Giveaway”, write a short description of the prize, and upload an image of the prize.
To add an image of the prize, click on the Select Image button to choose a photo from your media library or upload a photo from your computer.
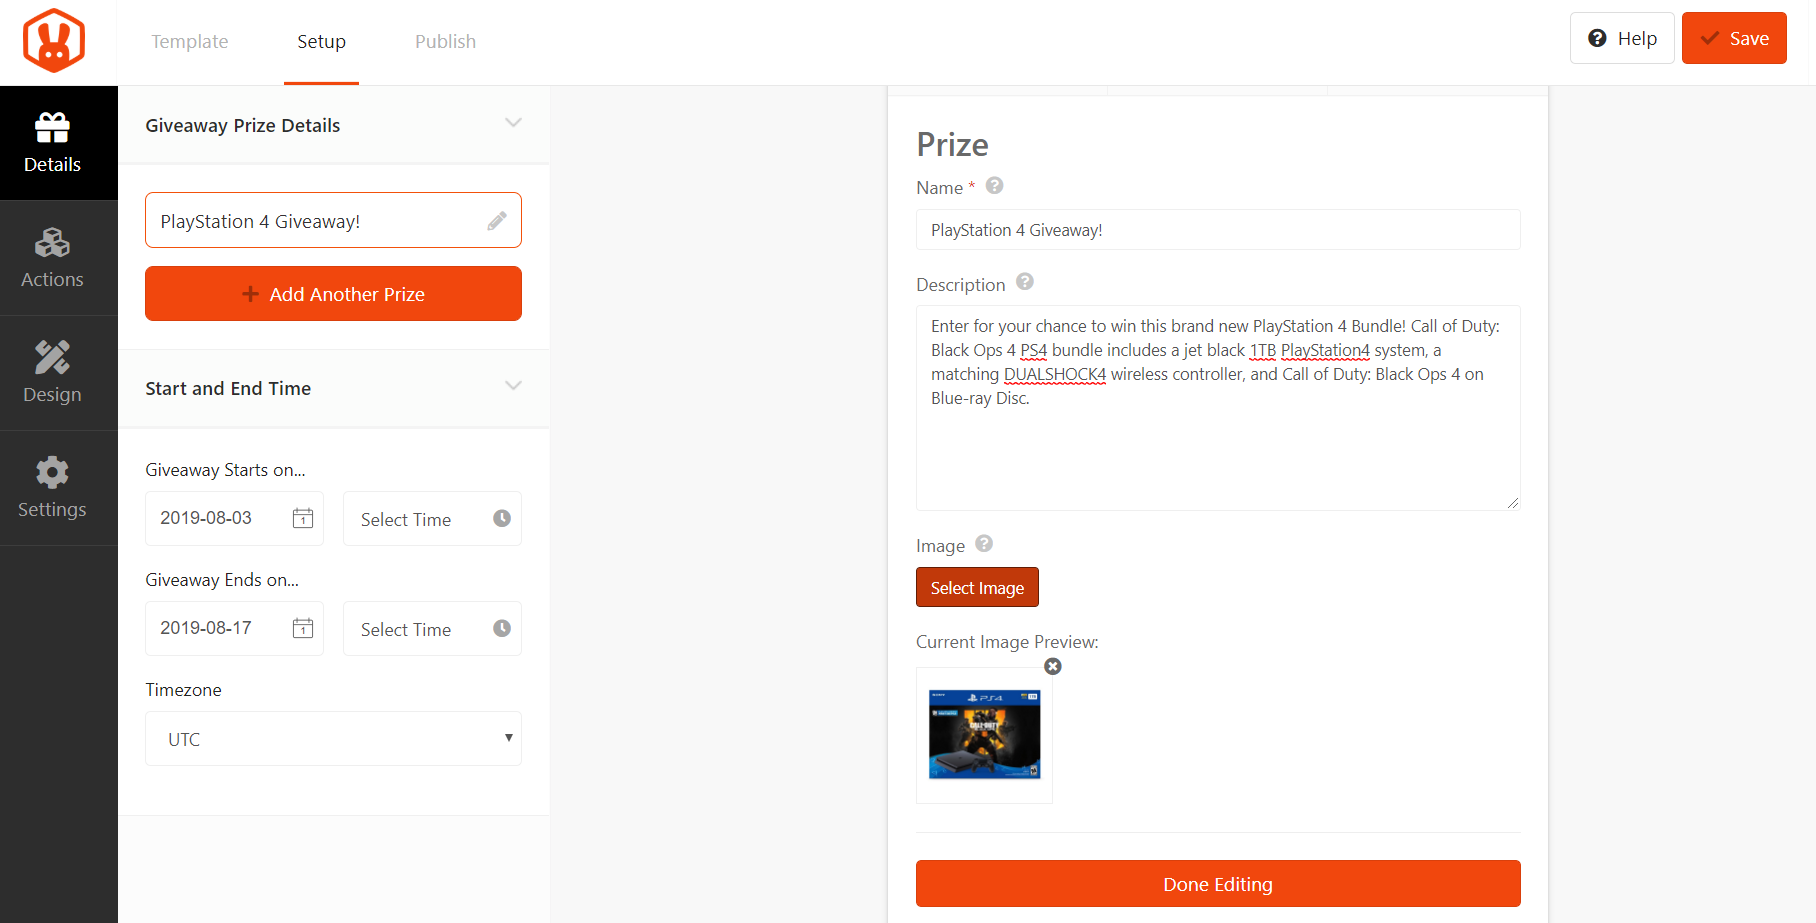
When you’re finished adding the prize details, click Done Editing.
If your giveaway has more than 1 prize, you can add another prize by clicking on the +Add Another Prize button.
Below the Prize Giveaway Details section, take a moment to select the date and time your giveaway will start and end in the Start and End section.
Click the Save button in the top right corner to save your progress. Remember to do this periodically while building your giveaway campaign.
Step 5: Choose Your Contest Entry Methods
The best part about RafflePress is the ability to give users multiple ways to enter your giveaway. Plus, these entry methods can help you reach your goals and grow your business.
For example, users can get 1 contest entry for signing up for your email list, a 2nd contest entry for visiting your Facebook page, a 3rd entry for visiting your Youtube channel, and so on.
Users will likely complete all of the actions in order to get more entries and increase their chances of winning the contest.
To add contest entry actions to your giveaway campaign, click on the Actions tab. Then, simply click on any action to add it to your giveaway campaign.
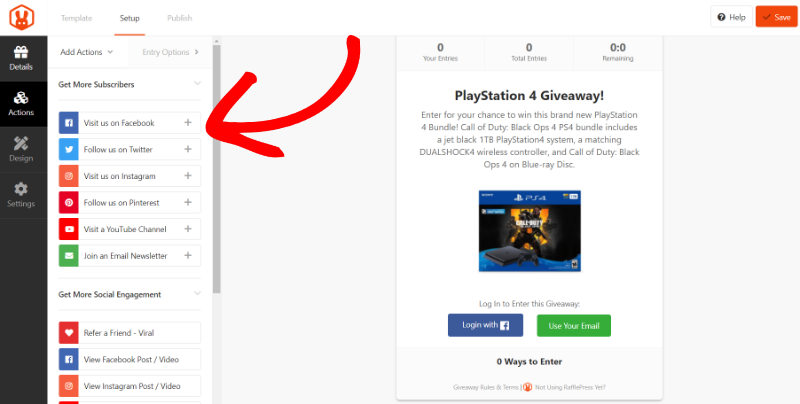
You can add as many actions as you want and set entry options for each of them. Entry options include setting the title for the action, the value (how many entries each action is worth), whether the action is mandatory, and there’s also a field to add the URL to your Facebook page, Twitter, etc.
Simply drag and drop actions to rearrange them if you wish.
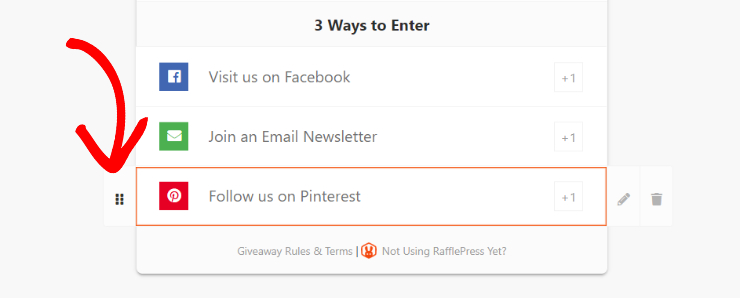
When you’ve added all the actions you want, click Save to continue to the next step.
Step 6: Customize Your Giveaway Design
Now you can give your giveaway campaign a customized look to match your brand.
To customize your giveaway design, head to the Design tab.
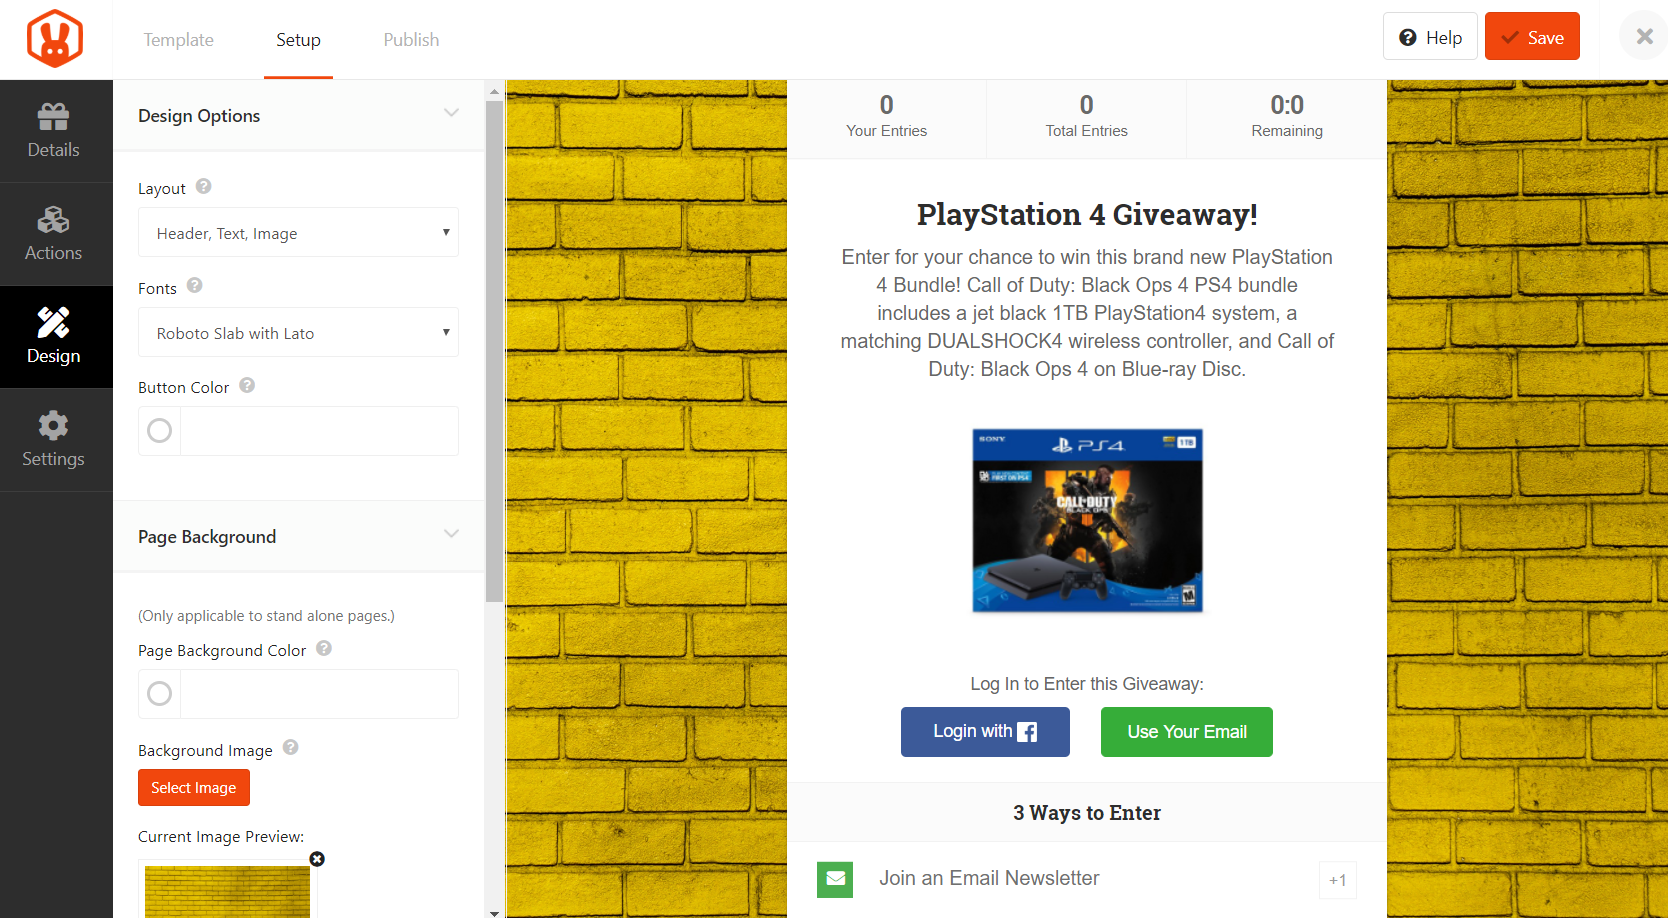
You can choose from 2 different layouts, select your font, set the button color, pick a background image or color (for landing pages), and more.
After you’ve finished customizing the look of your giveaway campaign, click the Save button.
Step 7: Configure the Contest Settings
Next, you’ll need to set some rules for your giveaway campaign. Luckily, RafflePress makes this easy.
Go to the Settings tab and click on Giveaway Rules. RafflePress offers a Rules Generator Template to help you get started.
Simply click on the +Generate Rules button and a window will pop up where you can type in the sponsor name, email, address, minimum age to enter, eligible locations, and so on.
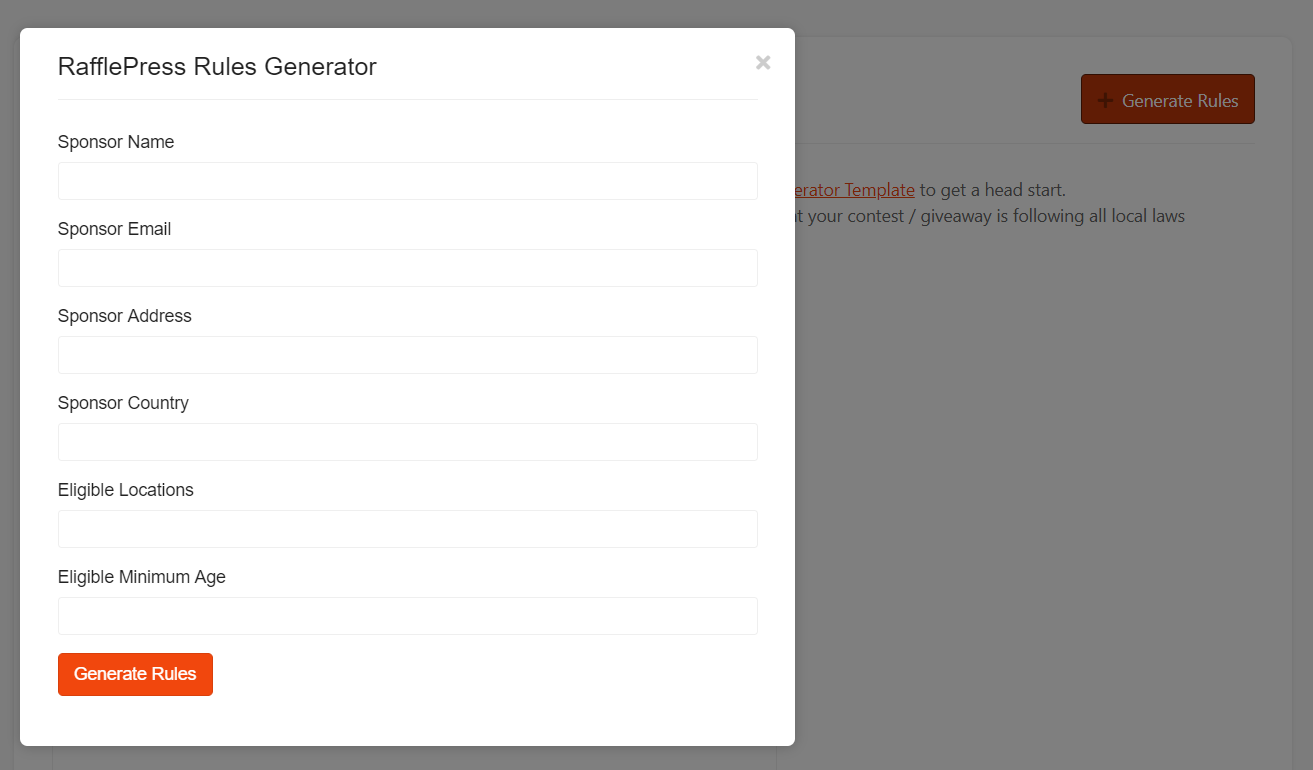
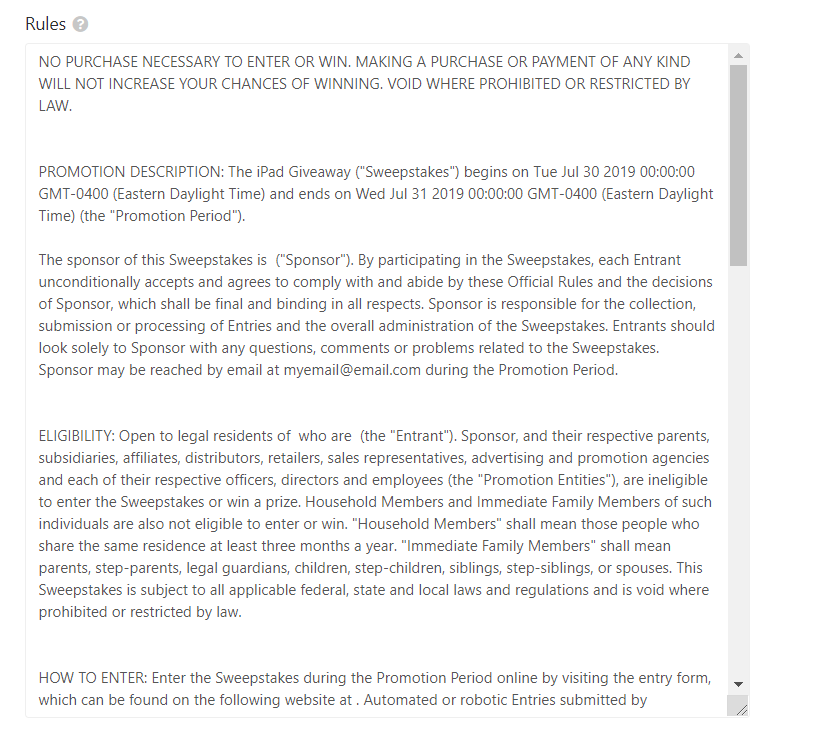
When finished, click on the Generate Rules button and RafflePress will automatically create basic contest rules for you.
In the Settings section you can also configure settings for email verification, social logins, success redirects, and more.
Step 8: Publish Your Giveaway
Now it’s time to make your giveaway campaign live. To publish your giveaway, click on the Publish button at the top of the screen.
RafflePress offers 3 different ways to publish your giveaway campaign, which are:
- RafflePress WordPress Block – Embed the giveaway widget in your WordPress post or page (new WordPress block editor).
- WordPress Shortcode – Embed the giveaway in the classic WordPress editor, sidebar widgets, or inside your WordPress theme.
- Giveaway Landing Page – Create a distraction-free landing page for your WordPress website.
Choosing the giveaway landing page option is recommended. Because a landing page removes all other distractions, users will be more likely to enter your giveaway.
So, choose the giveaway landing page option and click View Page to see what your giveaway landing page looks like.
Step 9: Pick the Giveaway Winner
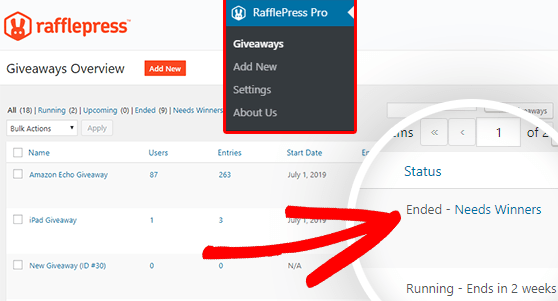
Once your giveaway has ended, it’s now time to finally pick a winner. The easiest and fairest way to pick a giveaway winner is by random draw. Luckily, RafflePress makes this process easy as well.
To pick a winner for your giveaway, head over to RafflePress >> Giveaways. Then, click on the Needs Winners link next to your giveaway campaign.
Here you’ll be able to see all the users who entered your giveaway along with how many entries they have.
To pick a winner, just click on the Pick Winner button, select your options, and click on the Choose Winners Now button.
RafflePress will then highlight a random winner. You can email the winner right from RafflePress to let them know about the good news by clicking the Email Winner link.

Congratulations on running a successful giveaway!
Over to You
Don’t wait any longer to create your first online giveaway. Your audience and your customers will be thrilled at the chance to win an awesome prize from you. Not only will you make the day of one lucky winner (or a few), but you’ll be able to grow your business at the same time.