Even though it has already been around for a number of years, the rapid growth of YouTube does not appear to be slowing down any time soon. Yes, all the “influencers” and online personalities also share their content via channels like Instagram and Snapchat, but YouTube is undeniably one of the most powerful tools in your online arsenal, whether you’re making money from the videos directly or you are using your videos as a marketing channel for your other products or services.
We have to remember that your success is also YouTube’s success. It’s in YouTube’s best interest if all of your videos are truly stupendous and rack up thousands of views, because it means they are also growing their audience and raking in more ad revenue. It’s win-win-win all around and that’s why YouTube wants to arm you with so many tools to further improve your videos and your channel.
By now, you should have already enabled featured content and branding, but what else can you do to boost your viewership? Something that you may have overlooked is the YouTube end screen. It used to be that you had to do this manually with annotations, even hard-coding some content into the video you upload, but now it’s a tool that’s built right into the YouTube system.
For the purposes of this demonstration, we’ll take a look at a Christmas video I made at a local attraction here in Vancouver. With the end screen, you can promote your videos, channel and other content, keeping your viewers with you rather than letting them drift away to some other part of YouTube.

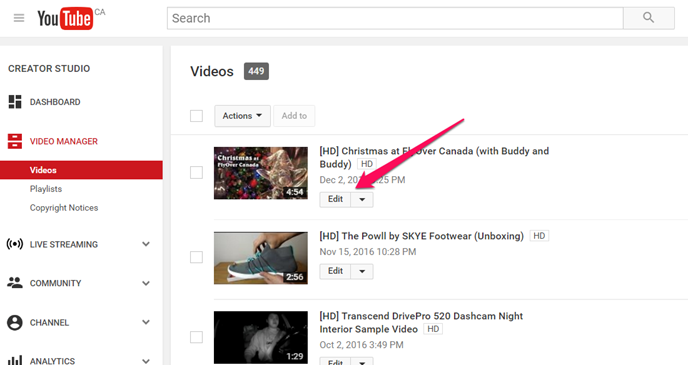
So, the first thing that you’ll need to do is access the video manager in YouTube. Assuming that you are already logged into your account, click on your profile picture in the top-right corner and select the Creator Studio button. From there, click on Video Manager in the left sidebar and find the video where you’d like to customize your end screen.
Once you do, go ahead and hit the corresponding “edit” button.
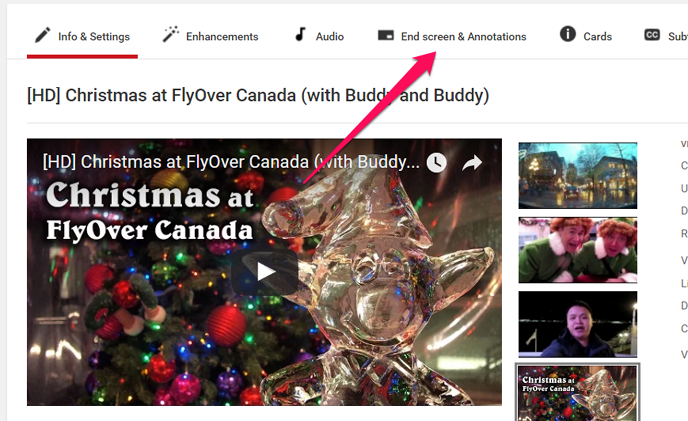
As you might already be familiar, the video editor page is further sub-divided into a number of tabs. The first one lets you write your video description, add meta tags, select your video thumbnail (use a custom thumbnail whenever possible!), and so on.
Look to the fourth tab called “End screen & Annotations.” This used to be only for annotations, but the end screen options have since been added to completely streamline this process. Just keep in mind that if you use annotations, you can’t use the end screen options (or vice versa). It’s one or the other.
Now, you have another choice to make. You can set up your end screen manually by adding up to four “elements” and arranging them on the screen accordingly. Keep in mind that these end screen “elements” can only appear within the last 20 seconds of your video. That’s something you’ll need to consider when editing your video in the first place for upload.
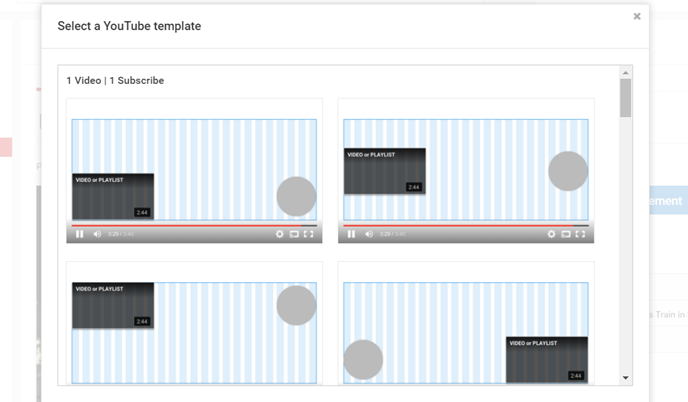
Instead of setting up your end screen manually, it’s easier and more efficient to use one of the pre-designed templates. Just above your video thumbnail, click on “use template” to bring up the dialog shown above. There are templates for one video and one subscribe; one video, one subscribe and one link; two videos; two videos and one subscribe; and more. Pick the one you like the best.
There are four main types of elements that can be added: a link to a video or playlist (including a thumbnail image), a subscribe button (showing your channel’s profile picture, which expands with mouse-over), a channel button (to promote another channel), or a link (to an approved website).
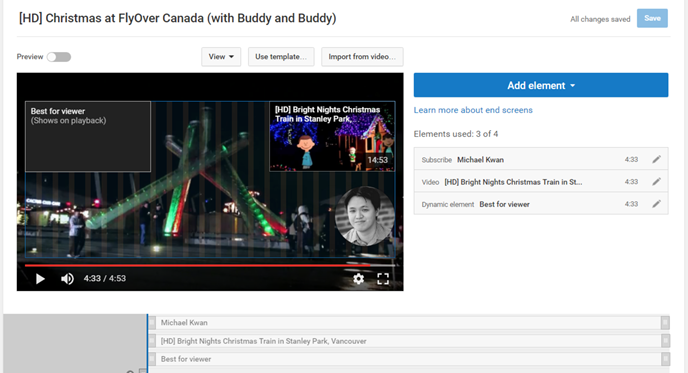
If you want to promote a video, what’s great is that you can not only select a specific video, but you can alternatively have it showcase your most recent upload or have the algorithm decide on one of your videos that is best suited for the individual viewer. I typically use a combination of two of these for my end screen.
Once you get used to a certain template or layout, it’s not a bad idea to stick with it and to edit future videos to accommodate that layout accordingly. I happened to luck out on this layout here, but your mileage may vary. And remember to click save when you’re done!
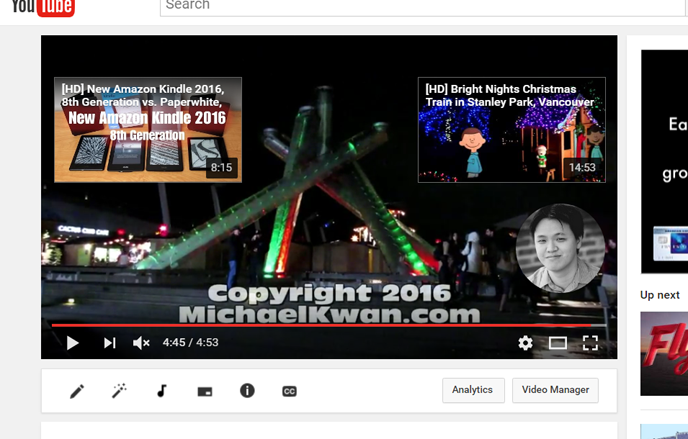
And that’s it. Do a quick preview of your video to make sure the end screen is displaying (and linking) correctly. As you can see in this example, the “best for viewer” video suggestion showed up as my video comparing a number of Amazon Kindle e-readers. If you watch the same video, it may bring up a different suggestion.
While the conversion rate on these end screens remains somewhat unclear, it is in your best interest to utilize this tool to retain your viewers’ interest. Use it in tandem with YouTube “cards” where appropriate too. Put it all together and you’ve got yourself a much more professional presentation that’ll keep your subscribers (and new viewers) coming back for more.